Anatomy of a Ring
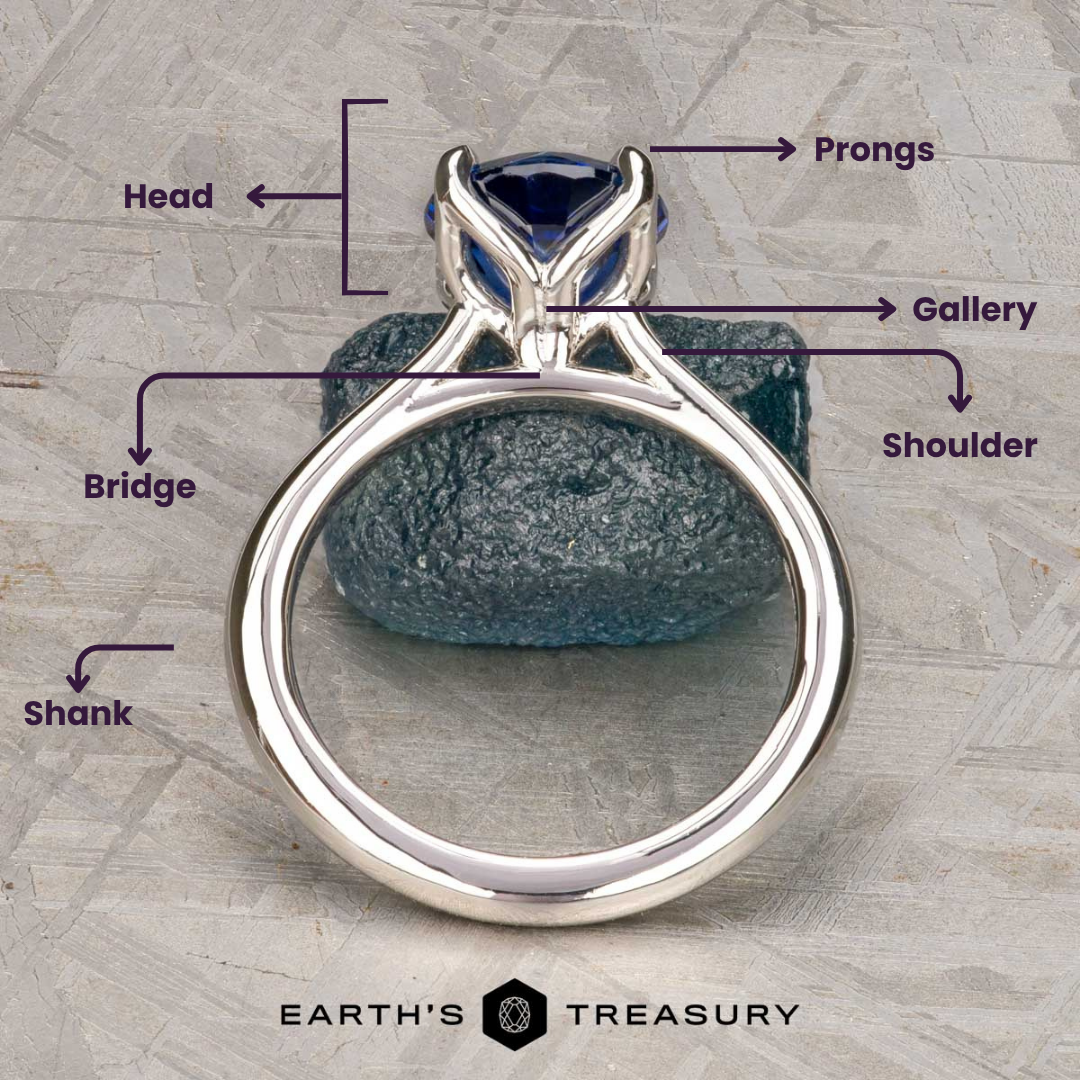
Choosing the perfect ring isn’t just about picking a stunning center stone. Understanding the various parts of a ring can help you make more informed decisions and communicate your design preferences clearly. Every component plays a role in both the beauty and durability of your ring.
When talking about the anatomy of a ring, we look at its profile, or the view of the ring from the side. Refer to the diagram of this ring’s profile as we break down each element of a ring and how you can customize them to create a truly unique piece.
Head
- The head is the structure at the top of your engagement ring that holds up the center stone. It will use either prongs or a bezel to secure the center stone.
Gallery
- The gallery is the space beneath your center stone, visible from the ring’s side profile. In some rings, galleries are barely noticeable while in others, they are enhanced with design elements including accent stones, hidden halos, or other intricate details.
Shoulder
- The shoulders of a ring connect the head to the shank, providing structural support and influencing the overall design. While some rings do not have distinct shoulders, others, like cathedral styles, feature shoulders that arch upward to create height and allow for more intricate designs.
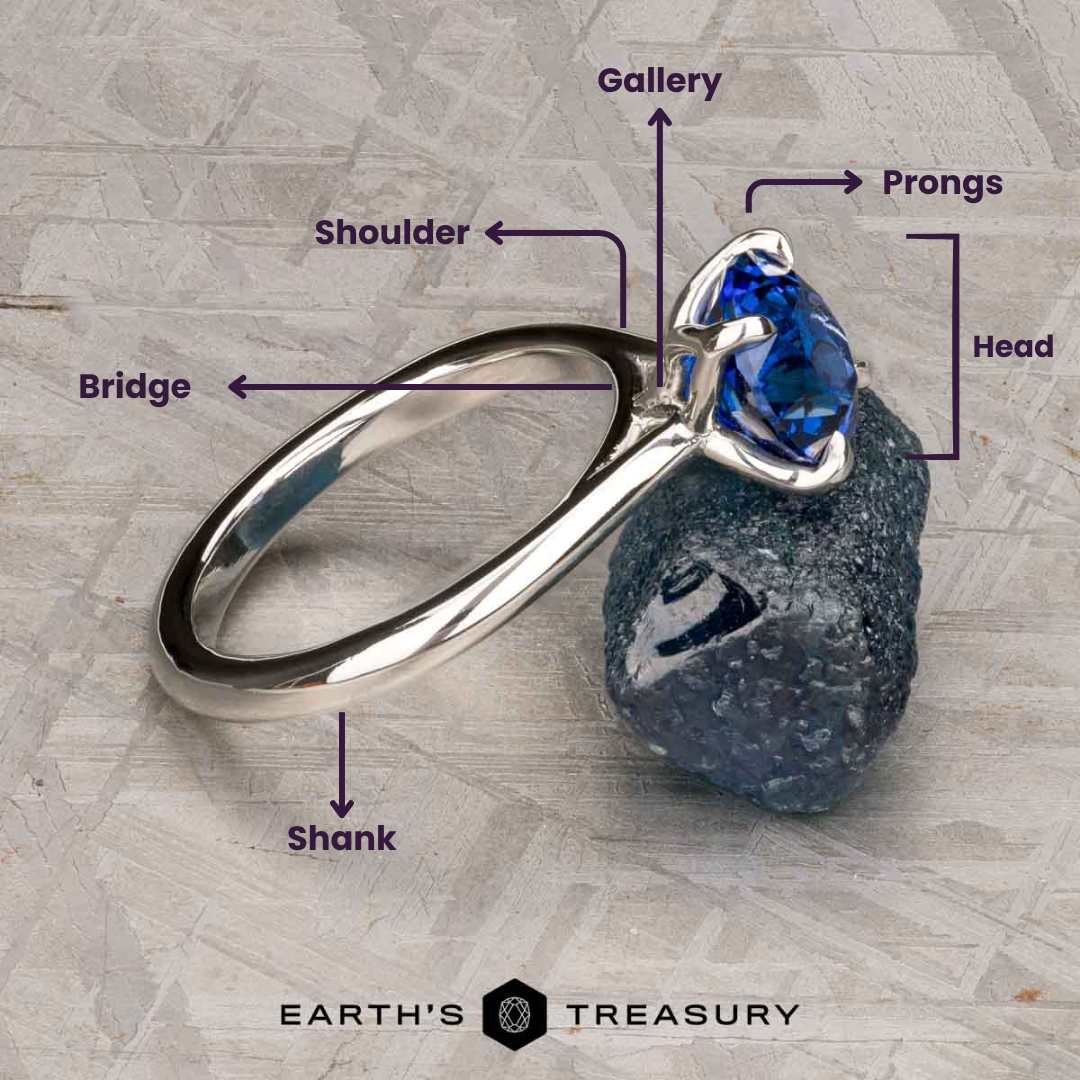
Bridge
- The bridge is the section of the shank that rests on top of your finger. It can be enhanced with design elements, including hidden gems or engraving that are visible when viewing your ring from the side.
Shank
- The shank is the band of metal that encircles your finger. It can have different widths and profile shapes. It can also be plain, sculptural, or accented with engraving or smaller gems
Prong
- Prongs are the metal tips that secure your center stone in place. There are many different prong styles, the most popular being round prongs and claw prongs. In some rings, the center gem is held with a bezel, surrounding the gem entirely with metal. Read our Prong Style Guide for more information.